Downlight Installation Guide: Size, Wattage, Spacing, and Lighting Design Tips
一、引言
In modern residential interior design, indoor downlights have become a common lighting solution in many homes. Unlike traditional pendant lights or ceiling lights, downlights can be recessed into the ceiling, reducing visual heaviness and making the overall space look cleaner and more streamlined. At the same time, downlights can be combined with ambient lighting, accent lighting, and wall-washing lighting according to the needs of different areas, creating richer layers of light. However, installing downlights is not simply a matter of selecting the fixtures and mounting them. Every detail, from downlight size, downlight wattage, and beam angle to downlight installation spacing and color temperature, can affect the final lighting performance.
This is especially important during residential renovation. If you only consider the appearance, price, or basic specifications of the lighting fixtures without confirming the cutout size, fixture positions, and actual lighting requirements in advance, you may discover after moving in that the space is too dim, glare is excessive, certain walls are over-illuminated, or the color temperatures between different areas do not coordinate well. Therefore, the layout of indoor downlights should ideally be considered from the early stages of interior design planning rather than being decided at the last minute before ceiling construction.
For homeowners, understanding the basic principles of downlight installation makes it easier to communicate their expectations for brightness and atmosphere with their designer. For interior designers, having a good understanding of downlight size, downlight wattage, installation spacing, and optical conditions also helps achieve a balance between aesthetics, practicality, and visual comfort. The following sections will explore common downlight specifications, installation positions, fixture spacing, color temperature, beam angles, and installation considerations to help you understand how indoor downlights should be planned.
了解更多:
2026室內設計風格、案例指南,設計師私藏11大風格完整解析!
居家燈具全攻略:燈具類型、挑選重點與空間應用一次看!
室內燈具/居家燈具專區 - LED照明燈具領導品牌
Ⅱ. Why Should You Pay Attention to Residential Downlight Installation?
When planning downlights, many people first ask, “How many fixtures does the room need?” In reality, the number of fixtures is only one part of the overall lighting design. Even if six downlights are installed in the same living room, the final lighting effect and spatial atmosphere can be very different depending on whether they are evenly distributed across the ceiling or positioned around the sofa, coffee table, display cabinet, and other functional areas. In addition to the quantity, downlight wattage, beam angle, and installation position should all be considered together.
The installation position of downlights also directly affects glare and visual comfort. If a fixture is positioned directly above a sofa or bed, people may easily see the light source when sitting, lying down, or relaxing, which can cause discomfort after prolonged exposure. On the other hand, if downlights are installed too close to the wall, the light may become concentrated on a small section of the wall, creating excessive brightness or uneven light and shadow. Therefore, downlight installation spacing should not be determined simply by pursuing symmetry; it should be adjusted according to the function of the space and the direction of the light.
Modern interior design is also placing increasing emphasis on the concept of “seeing the light rather than simply seeing the fixture.” Therefore, when designers plan indoor downlights, they do not necessarily rely on high-wattage or large numbers of fixtures to achieve sufficient brightness. Instead, they select appropriate downlight wattage, beam angles, color temperatures, and fixture positions according to the needs of each space. As long as the light is distributed properly, even a smaller number of fixtures can provide sufficient illumination while creating a softer, more layered, and visually enduring lighting environment.


了解更多:
崁燈選購指南: 崁燈瓦數、尺寸、類別與亮度規劃一次看!
室內燈具怎麼選?燈具款式與裝潢應用全解析|室內設計
高CP值的崁燈該如何挑選? 3分鐘快速學會! 室內設計、水電工程必看
Ⅲ. Key Points for Indoor Downlight Installation
1. What Are the Common Indoor Downlight Sizes and Wattages?
When choosing indoor downlights, most homeowners first compare downlight size and downlight wattage. However, these two specifications alone cannot determine whether a fixture is suitable. Downlight size is related to ceiling cutout dimensions, overall visual proportions, and fixture arrangement, while wattage is associated with luminous flux, coverage area, and the brightness required by the space. Therefore, before deciding on the specifications, it is best to first determine the purpose of the space and its lighting requirements, then select the appropriate fixtures.
A. Mini Cabinet Downlights
Mini cabinet downlights are generally compact in size, with a common cutout diameter of approximately Φ3 cm and wattages ranging from around 2W to 3W. Because of their small size and flexible installation options, they are well suited for cabinets, display cabinets, shelves, or localized storage areas, where they primarily provide supplementary lighting rather than serving as the main lighting source for an entire room.
For example, in a kitchen, if illumination comes only from the main lighting fixtures installed on the ceiling, a person’s body or the cabinets may block the light while they are working at the countertop, creating shadows in the work area. Installing mini cabinet downlights underneath the wall cabinets can provide direct illumination to the countertop, making food preparation, cooking, and cleaning easier and more clearly visible.
In addition to kitchens, mini downlights are also suitable for display cabinets, where localized lighting can highlight the details of collectibles, artworks, or decorative objects. Since 2W–3W is relatively low wattage, these fixtures are better suited for functional supplementary lighting or accent lighting. If they are expected to serve as the primary lighting for an entire space, they will generally need to be combined with other indoor downlights.
B. Downlights For Ambient Lighting
Downlights for ambient lighting are available in a relatively wide range of specifications, with common cutout diameters of approximately Φ5.5 cm–Φ15 cm and wattages of around 7W–20W. Traditional residential interiors often used larger diffused downlights, but as interior design has increasingly emphasized minimalist aesthetics, low glare, and refined proportions, small and medium-sized anti-glare downlights have become increasingly popular.
Many residential projects today use small and medium-sized anti-glare downlights with cutout diameters of approximately Φ5.5 cm–Φ9.5 cm. These fixtures not only reduce visual clutter on the ceiling but can also minimize direct glare through recessed light sources and optical distribution. Among them, anti-glare downlights with a diameter of approximately Φ7.5 cm are also a size frequently considered by interior designers when planning residential ambient lighting.
However, a larger downlight size does not necessarily mean better lighting performance. The actual result still depends on factors such as luminous flux, light distribution, ceiling height, and the size of the space. If a small home uses too many large downlights, the ceiling may appear visually fragmented. Conversely, if a large space uses fixtures with insufficient wattage, more fixtures may be required to achieve adequate overall brightness.
C. Full Spectrum Downlights
Full spectrum downlights commonly have cutout diameters ranging from approximately Φ5.5 cm to Φ15 cm, with wattages of around 7W–18W. One of their main characteristics is high color rendering, with some products offering a CRI of 98 or above. Compared with standard lighting sources, high-CRI fixtures can reproduce the original colors of objects more naturally and completely, making them suitable for residential environments where color accuracy and material appearance are particularly important.
In interior design planning, full spectrum downlights can be used in living rooms, dining rooms, bedrooms, walk-in closets, and art display areas. This is especially beneficial in homes that make extensive use of wood, textiles, artworks, or distinctive materials. High color rendering light sources can make the colors and textures of different materials appear more natural while enhancing the overall visual quality of the space.
For example, high-CRI lighting in a dining room can make the colors of food appear more natural, while in a walk-in closet, it can reduce color discrepancies caused by insufficient color rendering. For homeowners who value the visual quality of their interiors, CRI is also an important specification to consider when selecting indoor downlights, in addition to comparing downlight size and downlight wattage. It is also advisable to discuss the actual requirements with the designer in advance.
D. Waterproof Downlights
Waterproof downlights commonly have cutout diameters of approximately Φ5.5 cm–Φ9.5 cm, with wattages ranging from around 7W to 20W. They are mainly designed for spaces that are frequently exposed to water vapor or moisture. Common applications include bathrooms, shower areas, balconies, and other locations where waterproof or moisture-resistant lighting is required.
When installing downlights in bathrooms, it is especially important to pay attention to the fixture’s protection capabilities and its actual installation location. Different areas can be exposed to different levels of moisture, so their required protection ratings may also vary. Therefore, simply seeing the term “waterproof downlight” is not enough to determine whether a fixture is suitable. The actual IP protection rating should be confirmed, and the appropriate fixture should be selected according to the specific environment.
In addition, bathrooms are generally relatively small spaces, making the relationship between fixture brightness, downlight wattage, and beam angle even more important. If fixtures with excessive wattage are used or the light is overly concentrated in one area, the result may be uncomfortable brightness or glare. On the other hand, insufficient fixture coverage can create uneven lighting and excessive differences between bright and dark areas. Therefore, the selection of waterproof downlights and their installation positions should also be planned together with the overall interior design and actual daily usage requirements.
2. How Should Downlight Installation Spacing Be Determined?
Downlight installation spacing directly affects how light ultimately falls on walls, floors, and furniture, making it an essential part of indoor lighting planning. In addition to the fixture’s size, wattage, and beam angle, the distance between the fixture and the wall, as well as the spacing between individual fixtures, can change the distribution of light and shadow throughout the space. Therefore, before ceiling construction begins, the purpose of each downlight should be determined rather than simply arranging all fixtures at equal intervals for the sake of visual neatness.
A. Wall-Washing Lighting Effect
If you want to create a wall-washing effect with indoor downlights, the fixtures can generally be positioned approximately 25–35 cm away from the wall, with around 30 cm serving as a practical starting point for planning. Generally, it is not recommended to install them too close to the wall. For example, when the distance is less than 15 cm, the light can become overly concentrated on a localized section of the wall, creating excessively bright hotspots and making the wall appear less natural.
When a residential wall features distinctive materials, artistic paint, wood finishes, or a display function, wall-washing lighting can further emphasize the texture and details of the surface. However, the final effect is not determined solely by the downlight installation position. The beam angle and wall material also play important roles. Narrower beam angles generally create more concentrated and defined light spots, while wider beam angles can produce a softer and more even distribution of light.
If you want multiple downlights to create a continuous wall-washing effect, the spacing between fixtures can initially be planned at approximately 90–120 cm. However, this is not a fixed measurement suitable for every residence. The actual spacing should be adjusted according to the ceiling height, wall height, beam angle of the downlights, and the product’s light distribution. Rather than strictly following a predetermined measurement, it is better to first understand the actual coverage of the fixture and then determine the most suitable downlight installation spacing.

B. General Lighting / Ambient Lighting
When indoor downlights are primarily used for general ambient lighting, the distance between the fixtures and the wall can generally be planned at approximately 30–90 cm, with further adjustments based on the size of the space, ceiling height, and furniture arrangement. For typical residential spaces, downlight spacing of approximately 60–120 cm can serve as an initial planning reference, helping distribute light more evenly across the main activity areas.
However, furniture arrangements and circulation paths vary from one home to another, so downlights do not necessarily need to be arranged evenly according to a fixed grid. For example, if the main activity area in a living room is concentrated around the sofa and coffee table, the fixture layout can be adjusted according to the furniture. If more focused lighting is needed above the coffee table, the fixture spacing can be reduced according to the actual beam pattern, with approximately 20–40 cm serving as a reference for localized placement. For general residential areas, downlight spacing can typically be maintained at approximately 60–120 cm.
In other words, there is no single standard answer for downlight installation spacing that applies to every home. Furniture placement, walls, circulation paths, and actual usage patterns should all be considered during planning. In particular, for main activity areas such as sofas, beds, and coffee tables, attention should be paid to whether the fixtures will fall directly within the user’s field of vision. If ceiling alignment is prioritized at the expense of glare control, a space that should feel comfortable may instead become visually harsh.


Color temperature can change the overall first impression of a home and also affect how comfortable people feel within the space. In general, 3000K warm white light creates a warmer and softer visual atmosphere, making it suitable for relaxation and rest. 4000K natural light, on the other hand, is relatively bright and clear, making it more suitable for areas where people need to distinguish details and perform everyday activities. Therefore, when selecting home downlights, you should consider not only personal preferences but also the function of the space, furniture materials, and overall interior design style.
3. How Should You Choose the Color Temperature of Downlights?

For living rooms, 4000K natural light is recommended as the primary color temperature, helping maintain a bright and natural atmosphere while supporting reading, conversation, and everyday family activities. Bedrooms can use 3000K warm white light to create a softer and more relaxing environment for rest. Kitchens and bathrooms are generally well suited to 4000K natural light, making it easier to distinguish details while preparing food, cooking, cleaning, or applying makeup. Dining rooms can use 3000K warm white light–4000K natural light depending on the home’s design style. If the living and dining areas are designed as an open-plan space, using consistent 4000K natural light is recommended to create better coordination between the different functional areas.
In addition, home lighting color temperature planning should not focus only on individual fixtures. The overall effect created by connected spaces should also be considered. For example, if the living room, dining room, and hallway are connected but use significantly different color temperatures, people may notice obvious changes in light color as they move between areas. Therefore, it is preferable to establish an overall lighting direction during the early stage of interior design planning. This is particularly important in open-plan homes, where maintaining consistent lighting color temperatures can prevent abrupt visual transitions between spaces.

了解更多: 室內燈具色溫怎麼選?全屋照明設計6大空間一次看
|Smart Lighitng System / Smart Downlights / Downlights Tunable White
4. How Should You Choose the Beam Angle of Downlights?
In addition to downlight size and downlight wattage, beam angle is another important specification that determines lighting performance. Simply put, a smaller beam angle generally produces more concentrated light, making it suitable for highlighting specific objects or localized areas. A wider beam angle covers a larger area and is therefore more suitable for general ambient lighting in residential spaces. When choosing a beam angle, you should first determine whether the fixture is intended to “illuminate the space” or “highlight a specific area.”

A. 24° Anti-Glare Downlights
24° anti-glare downlights feature a relatively concentrated light distribution and are suitable for areas where specific visual focal points need to be emphasized, such as artworks, paintings, display cabinets, distinctive wall surfaces, high-end furniture, or localized decorative elements.
If a living room has a feature wall made from distinctive materials, 24° anti-glare downlights can be used to focus light onto the wall or displayed objects, naturally directing attention toward a specific area. This lighting approach does not require increasing the brightness of the entire space. Instead, the contrast between light and shadow can create visual depth and make the interior design feel more dimensional.

B. 36°–50° Anti-Glare Downlights
36°–50° anti-glare downlights provide a wider coverage area than 24° fixtures, making them more suitable for general ambient lighting in residential spaces. They are commonly used in living rooms, dining rooms, bedrooms, hallways, and other areas intended for everyday activities. These beam angles can cover a larger area and are therefore highly practical for daily residential use.
Among them, 36° anti-glare downlights are a common specification in residential interior design. When combined with appropriate downlight installation spacing, they can distribute light relatively evenly throughout the activity area. At the same time, the anti-glare design helps reduce discomfort caused by the light source entering the user’s direct field of vision, balancing lighting performance and visual comfort.

C. Diffused Downlights
Diffused downlights primarily distribute light broadly downward across a large area, which is why they were commonly used in traditional residential interiors and general commercial spaces in the past. The advantage of this type of fixture is its wide coverage. However, without appropriate anti-glare treatment, it may be more likely to produce direct glare during prolonged use.
As modern interior design places increasing emphasis on lighting quality, residential projects and mid- to high-end commercial spaces are gradually moving away from simply pursuing sufficient brightness and instead placing greater emphasis on the direction, layering, and comfort of light. As a result, anti-glare downlights and curved full spectrum downlights are becoming increasingly common in many design projects. Through more precise light distribution and optical design, lighting can provide sufficient brightness while also reducing glare and enhancing the overall quality of the space.

5. What Should You Pay Attention to When Installing Downlights?
A. Avoid Installing Downlights Directly Above Certain Areas Whenever Possible
When installing downlights, certain positions require particular attention. Areas such as directly above the living room sofa, near the head of a bed, around the showerhead in a bathroom, and directly above the toilet should all be carefully planned according to actual usage conditions to avoid positioning fixtures directly above users whenever possible.
For example, in a bedroom, if a downlight is installed directly above the head of the bed, the light source can easily enter the user’s field of vision when lying down and cause discomfort. The same principle applies to the living room. When someone is sitting and relaxing on the sofa, a fixture directly overhead may produce glare because the light shines straight into their eyes. In bathrooms, waterproofing and safety also require particular attention in addition to visual comfort. Especially in shower areas, fixtures with appropriate protection ratings should be selected according to the actual environment, while the fixture position should prevent direct and uncomfortable light from shining into the user’s eyes.
Therefore, the position of indoor downlights should not be determined simply by evenly distributing fixtures according to the ceiling dimensions. More importantly, consider “where people will actually be.” Taking furniture placement, sitting and lying positions, and everyday circulation paths into account allows the lighting to genuinely support daily life. This is also one of the key differences between professional interior design and simply arranging lighting fixtures.
B. Pay Attention to Consistency in Lighting Color Temperature
The color temperature of lighting within the same space or connected areas should ideally remain coordinated. If different color temperatures are required, the difference should preferably remain within a reasonable range, such as approximately 500K–1000K. This is especially important when the living room, dining room, and hallway are connected. If one area uses 3000K and another suddenly switches to 6500K, the difference in light color can become extremely noticeable and may disrupt the visual consistency of the overall space.
In addition to color temperature, the fixture’s color rendering, brightness, and optical quality should also be considered. Even if two fixtures are both labeled 4000K, differences in LED light sources, optical design, and color rendering can still result in different appearances when the light falls on walls, furniture, or materials. Therefore, during interior design planning, it is best to establish a comprehensive lighting direction from the early renovation stage and coordinate downlight specifications, color temperature, and lighting effects as a whole rather than adding or replacing fixtures one by one after construction is completed. This approach helps maintain consistency in the function, visual appearance, and overall atmosphere of the home’s lighting.
四、結論
Although indoor downlights are among the most common lighting fixtures used in residential spaces, proper planning still involves multiple factors, including downlight size, downlight wattage, beam angle, color temperature, installation spacing, and the intended use of the space. Whether you are considering small cabinet downlights, general ambient downlights, full spectrum downlights, or waterproof downlights, each type has its own suitable applications. A larger size or higher wattage does not necessarily mean better lighting performance.
When installing downlights, it is also not advisable to focus solely on arranging the fixtures in a neat pattern. Instead, planning should begin with the function of the space and the areas where people actually move and spend time. For wall-washing lighting, a distance of approximately 25–35 cm from the wall can be considered depending on the wall and fixture conditions. For ambient lighting, the distance can generally be adjusted to approximately 30–90 cm according to the ceiling height, room size, and fixture beam pattern, while the actual fixture spacing should also be determined based on the beam angle and coverage area. For living rooms, kitchens, and bathrooms, 4000K natural light can be used as the primary choice, while bedrooms can use 3000K warm white light. For an open-plan living and dining area, using consistent 4000K natural light can also help maintain a coordinated visual effect throughout the space.
If you are currently renovating your home, instead of waiting until ceiling construction is about to begin before deciding where to install the downlights, it is better to discuss the lighting requirements with your designer during the interior design planning stage. Furniture placement, circulation paths, main activity areas, downlight size, downlight wattage, and installation positions can all be integrated during the early planning stage. This allows the lighting to work with the space rather than forcing the space to accommodate the lighting. When the downlight specifications, beam angles, color temperatures, and installation spacing are properly coordinated, the lighting can not only satisfy everyday needs but also create a more comfortable, natural, and refined residential environment.
更多資訊:
照明設計全攻略:解析6大裝潢風格照明與燈具選購要點|室內設計
照明設計攻略:設計師私藏居家照明5大技巧,小預算打造居家高級感|室內設計
燈具色溫怎麼挑? 設計師推薦暖白光、自然光與冷白光,教你規劃全屋室內照明!
櫥櫃鋁條燈指南:5大櫥櫃照明重點+獨家鋁條燈推薦,打造質感居家空間
10大裝潢風格推薦|家具配置 × 燈具挑選 × 完整室內設計案例指南!
客廳照明設計怎麼做?6大燈光配置技巧,打造舒適居家空間
臥室照明設計怎麼做?6大燈光配置技巧+常見問題解析
廚房照明設計怎麼做?5大燈光配置技巧,打造高質感廚房空間
浴室照明設計怎麼做?5大燈光配置技巧,打造時尚安全衛浴空間
如有室內照明設計或室內燈具相關採購需求,歡迎透過以下管道聯繫我們:
● 官方網站: https://tj2lighting.com
● 聯繫電話: +886 -4-25341768
● 電子郵件: sales@tj2lighting.com
● Line: @034wnuyy
| 室內燈具推薦
| 相關文章
-
專業LED居家燈具製造與供應商 | 臥室照明設計/臥室燈具採購 | 商業照明 | 居家照明 | 照明設計實務 | 室內照明/室內燈具 | 專業LED室內燈具製造與供應商 | 客廳照明設計/客廳燈具採購
如何挑選崁燈高度與尺寸?設計師私藏燈具規格全解析
在當代空間規劃的範疇內,光與影的交織往往是決定設計質感的最終關鍵。當我們置身於專業人士規劃的場域時,常能體會到一種精緻且放鬆的氛圍,這背後其實包含了精密的光學計算與燈具篩選邏輯。在各類照明設備中,崁燈憑藉其簡潔、隱蔽且具備高度整合性的特點,成為了居家裝潢中最核心的照明方案。無論是需要營造溫潤感的客廳,或是要求高亮度視野的廚房,崁燈都能透過多樣的規格配置,精準達成不同空間的照明目的。崁燈高度、開孔尺寸以及額定瓦數這三大指標,不僅關乎光學表現,更直接影響天花板的施作工法與長期的居住安全。
-
室內照明/室內燈具 | 臥室照明設計/臥室燈具採購 | 商業照明 | 居家照明 | 照明設計實務 | 專業LED室內燈具製造與供應商 | LED 照明解決方案領導品牌 | 客廳照明設計/客廳燈具採購
燈具高度與尺寸如何選擇?設計師私藏的燈光規格一次看!
在室內設計的專業領域當中,燈光配置絕對不僅僅是為了提供基本的照明功能,它更是營造居家氛圍、突顯空間視覺層次、甚至能進一步影響居住者心理感受的靈魂角色。一套能被稱為成功的室內設計作品,其燈具的挑選流程、配置邏輯與最終的安裝規格,必然都經過了設計師極為精心的考量與計算。許多人在自行進行居家裝潢或軟裝佈置時,常會將視覺焦點過度放在燈具的外型設計或材質質感上,卻往往忽略了至關重要的燈具安裝高度與本體尺寸問題。本篇深度文章將完全從室內設計的專業實務角度出發,提供最詳盡的燈具高度與尺寸建議
-
裝潢風格案例/裝潢圖庫總覽 | 居家裝潢DIY/DIY裝修專案 | 居家照明 | 照明設計實務 | 室內照明/室內燈具 | 室內設計案例/室內裝修案例 | 北歐風室內設計案例/作品
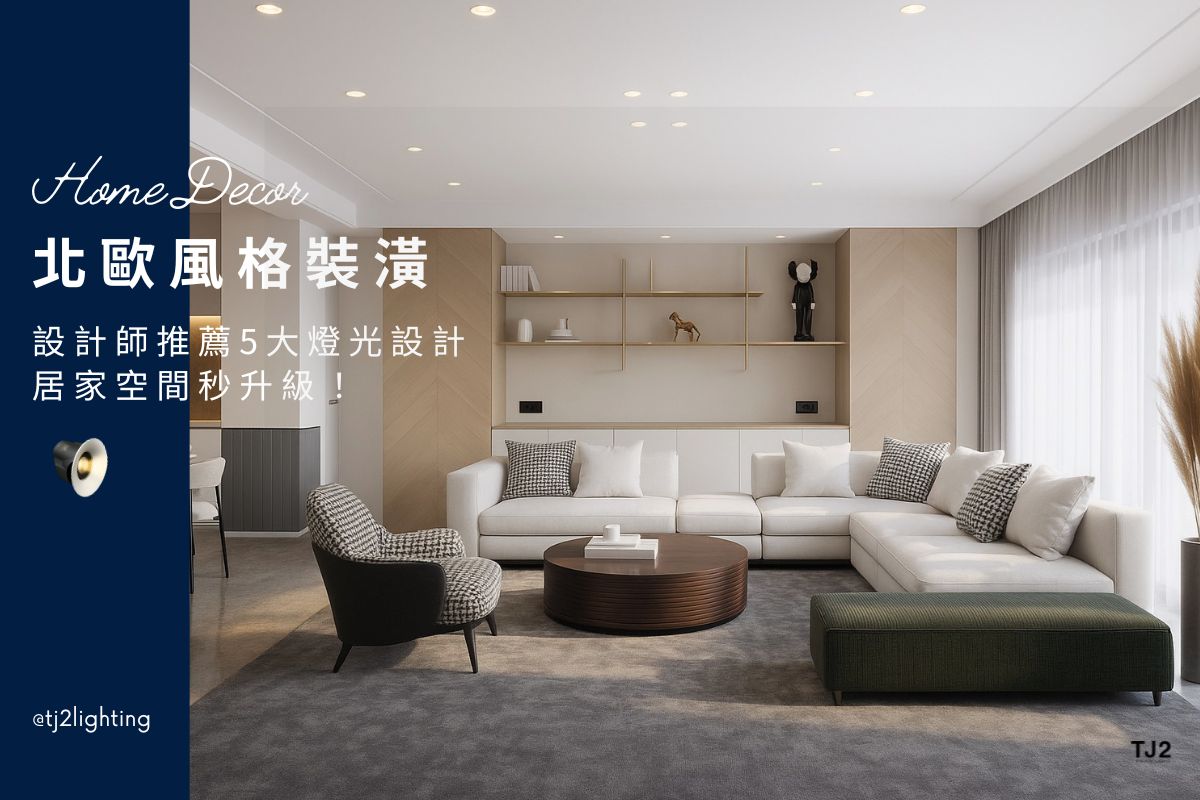
北歐風格裝潢|設計師推薦5大燈光設計技巧,居家空間秒升級!
北歐風格裝潢以「簡約、自然、舒適」聞名,近年來成為許多人心目中最理想的居家選擇。這種風格以純淨色彩、俐落線條與天然材質為基礎,營造出清新卻溫潤的生活氛圍。然而,許多在規劃北歐風居家的人,往往將重點放在家具挑選與軟裝搭配,卻忽略了燈光設計在其中的關鍵作用。即使選擇了再精緻的家具,如果缺少合宜的燈光襯托,整體氛圍也難以達到理想的效果。專業的室內設計師都知道,燈光設計並非只是單純的照明,它同時是塑造層次感、氛圍感與立體感的重要元素。透過妥善的燈光規劃,北歐風格裝潢能更具美感與舒適度,讓居住者在不同時間都能享受最佳的空間氛圍。
TJ2 Lighting 東捷生活科技 | LED照明解決方案領導品牌 | 照明設計公司 | 深耕台灣,逐鹿全球
TJ2 Lighting 專注於室內、商業和戶外照明,包含LED崁燈、吸頂筒燈、軌道燈、投射燈、壁燈、埋地燈/地底燈、戶外柱燈/庭園燈和LED光源模組等,提供多種樣式燈具以及客製化服務。TJ2 Lighting擁有一條龍的MIT產銷體系,能夠提供給客戶最及時、彈性的照明解決方案,以及優質的照明設計服務。
身為台灣LED照明解決方案領導品牌,團隊具有多年內銷、外銷經驗,與國內知名品牌業者、室內設計師均有合作,並致力於提供完整的照明產品與照明設計服務,以達到最大的客戶滿意。